Thursday 27 March 2014

5 Reasons Why You Love Windows XP & What You Sacrifice

              Nearly 30% of computers on the web are still using Windows XP. It was the first consumer version of Windows that really delivered on its promise, providing a stable, reliable system after the unreliable DOS-based Windows 9x systems. But all good things come to an end. There are many reasons people love Windows XP, but most of them aren’t a good reason to keep using it.

Your Windows XP Computer Works Fine

Your Windows XP system may seem like it works just fine. Why bother upgrading to a modern version of Windows when Windows XP lets you get on the web, use Office, and do whatever else you need?

Windows XP is still supported by software and hardware developers, anyway. New software usually still supports Windows XP, while hardware generally has Windows XP drivers, too. That new iPhone 5S can still sync with iTunes on Windows XP, after all.


Unfortunately, the reality is that your Windows XP system isn’t going to keep working fine forever. As Microsoft stops rolling out security updates, it’s going to be increasingly insecure. Attackers will exploit all the security holes they know about. More and more holes will be found over time, and they’ll never be patched. Yes, you can try to secure XP, but you’re much more secure if you upgrade to a modern version of Windows.

Microsoft’s end of support is also a sign to software and hardware developers that it’s time to stop supporting Windows XP. New software and hardware will eventually stop supporting Windows XP, just as it no longer supports Windows 98. Google Chrome will support Windows XP until at least April, 2015 — but Chrome may stop supporting Windows XP nearly a year from now. You just can’t use Windows XP forever, and now’s a good time to move on.

Solution: Accept that Windows XP will become increasingly vulnerable to attacks and unsupported by new software and hardware over time. Windows XP will one day be what Windows 98 is today — an old, incompatible, insecure operating system.


XP is Familiar and You Don’t Want Windows 8

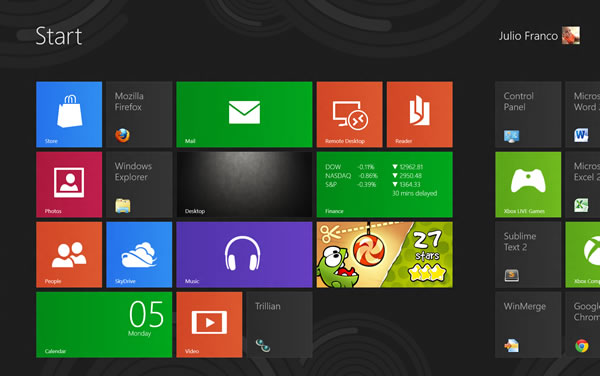
Windows XP was with us for so long that it feels familiar and comfortable, like an old pair of shoes. But, when that comfortable old pair of shoes starts falling apart, it’s time to get new ones. Worse yet, the most recent version of Windows is very different from Windows XP. The first version of Windows 8 didn’t even have a Start button, and Windows 8.1 still has an entirely new interface on top of the desktop.

Luckily, you can still upgrade to Windows 7 — Windows 7 will be supported until 2020 and is widely considered the new Windows XP. Windows 7 looks different, but it’s fundamentally very similar to Windows XP — Start menu, taskbar, Control Panel, and all the usual stuff. There’s no weird “touch-first” interface getting in the way.

You can also make Windows 7 look more familiar. For example, you can tweak the taskbar to function like it did in Windows XP and enable the Windows Classic theme, which will remove that transparent glass and provide you with a gray, Windows 2000-style interface.

Solution: If you like how familiar Windows XP is, skip Windows 8 and upgrade to Windows 7. You can make Windows 7 function and look more like Windows XP — and it works like an improved Windows XP even if you don’t customize it.


New Versions of Windows Are Expensive

When we talk about “upgrading,” people think about taking their current computer and installing a new version of Windows on it. However, this is often a bad idea — a boxed copy of Windows 7 or 8 costs around $100.

This is actually a lot of money when you can pick up a whole new computer with a new version of Windows for a few hundred bucks. Rather than buy an expensive boxed copy of Windows, you should probably just buy an entire new computer.

Windows XP was replaced by Windows Vista long ago, but let’s say you skipped Windows Vista and stuck with Windows XP until Windows 7 came out. Windows 7 was released on July 22, 2009. That means, even if you bought a Windows XP PC when Windows Vista was current, your computer is at least four and a half years old.

Sure, if you have an expensive PC that still hums along nicely, you may want to stick with your current hardware — but most people will want to get new hardware. If you don’t want to buy a new computer just yet, securing that Windows XP system can help — but you should probably be thinking about buying a new computer soon.

Solution: Buy a new computer instead of an expensive boxed copy of Windows.


Upgrading is Time-Consuming

Upgrading takes some time. If you’re installing a new version of Windows on your current computer, you have to back up your data, install the new version of Windows, install hardware drivers, install the software you use, copy your files back onto the computer, and configure everything. Yikes! This could take all day, even if you know what you’re doing.

Along with the price, the annoyance of upgrading is a reason many people don’t put new versions of Windows on their current computers. Again, you’re better off just getting a new computer — sure, you’ll have to move your files to the new system and set it up, but setting up a shiny new computer feels a lot better than spending a day fiddling with your old computer.

There are also tools that make it easy to migrate your files. Microsoft is even providing a free copy of PCmover Express, a commercial data migration program. It will move your data from your Windows XP PC to a new Windows PC over the network. There are also other tools you can use — Apple even provides a tool that will copy the data from your Windows XP computer to a Mac.

Solution: Get a new computer and use a data migration tool to speed things up.


Software and Hardware Compatibility

Some old software only runs on Windows XP, and some old hardware devices only have drivers for Windows XP. This software or hardware won’t work on newer versions of Windows, so you may be keeping a Windows XP system around for this reason.

On the one hand, if you’re a typical home user with an old program, maybe it’s time to find a modern program that does the same thing. If you have an old printer that doesn’t have drivers for new versions of Windows, maybe it’s just time to buy a new printer. You can’t keep using that old, unsupported stuff forever.

On the other hand, some businesses are in more serious trouble. A business might have critical, irreplaceable hardware that only supports Windows XP. Or they might have an internal line-of-business application that requires Internet Explorer 6. Upgrading may just not be an option for a business if it requires having a new piece of custom software built or buying expensive, niche hardware. Sure, in the long run, the business should upgrade — but that’s easier said than done.

Of all the reasons not to upgrade here, this is the best one. If you can replace your old software and hardware, you should — but if you’re a business with expensive or custom stuff, you may not be able to replace everything in time.

Solutions: If you have Windows XP-only software, try upgrading to a modern version of Windows and running Windows XP in a virtual machine. You can then use your Windows XP-only software in an isolated container. If you have Windows XP-only hardware or software, you may want to isolate that XP system — unplug it from the network or block it from accessing the Internet so you can use your legacy hardware or software without exposing that XP computer to a dangerous Internet. Follow our guide to making Windows XP as secure as possible if you just can’t upgrade.


Whatever your reason, you won’t be able to stick with Windows XP forever. It’s time to let go of Windows XP and move on — even if you can’t upgrade today, you should be making plans to upgrade rather than sticking with XP for years to come.


Wednesday 12 March 2014

Install Windows 8 From a USB Drive, Dual-boot with XP, Vista and 7


Back when the Windows 8 Consumer Preview hit the Web, we offered a basic guide on configuring a virtual machine. With Windows 8's Release Preview available and the final version inching toward completion, we figure it's a great time to offer a similarly easy step-by-step walkthrough on installing Windows 8 with a USB drive.


If you're familiar with the process, there isn't much for you to see here, but this should serve as a quick confidence booster for anyone who hasn't installed an operating system recently.

Step One


If you're not sure what version of Windows 8 to download, we'd recommend the 64-bit build, especially if your system is relatively modern. You can read more about the difference between 32-bit and 64-bit operating systems here and the download page linked above provides system requirements for each architecture. The short of it: Windows 8 64-bit requires an extra 1GB of RAM and 4GB of storage -- negligible for most users. Also, before you ask, the Windows 7 USB/DVD tool will work fine with Windows 8.

Step Two

Create a bootable Windows 8 USB drive.

Naturally, to create a bootable USB drive, you'll have to insert one and it needs to be 4GB or larger. Install the Windows 7 USB/DVD tool. Once the utility opens, you should be able to browse for and select the Windows 8 ISO you downloaded as well as the USB drive you inserted. It's worth noting that your USB drive will be wiped, so save anything important. The process takes about five minutes depending on the speed of your drive. You'll see a message that reads "backup completed" when it's done.

Step Three

Install the Windows 8 Release Preview (key: TK8TP-9JN6P-7X7WW-RFFTV-B7QPF)

Needless to say, back up anything important before proceeding. If you plan to upgrade or overwrite your installation of Windows XP, Vista or 7, open the root directory of your USB drive in Windows Explorer and launch Setup.exe to begin. You'll get to choose between the two. Windows 7 users should have a painless upgrade as programs, Windows settings as well as user accounts and files are imported. However, Windows 8 won't save programs from Vista and it won't save programs or Windows settings from XP.


If you want to dual boot Windows 8 with your existing operating system, you'll have to install a second storage device or create a new partition. The former is relatively self-explanatory, just attach the drive and choose it during the installation process. The latter, however, requires a little more effort. Vista and 7 users can create a new partition with Windows' Disk Management application (Start > search for Disk Management). Once the application loads, you should see your operating system's drive. Follow these steps: 

Right click the drive that you want to house Windows 8 and choose "Shrink Volume" (Windows 8 64-bit requires at least 20GB, so shrink your current partition accordingly) 

Right click the new "Unallocated" space and create a "New Simple Volume" 

Choose the next available drive letter and quick format the partition with NTFS (you can name the volume anything, but we'd suggest something like Windows 8 RP x64) 


Windows XP users will have make partition adjustments with a third-party tool such as Partition Logic, but you'll do the same thing: shrink one volume to create another. It should be smooth sailing from here as Microsoft's installation process guides you through everything. Just boot off your Windows 8 USB drive, choose a custom installation and select your newly created partition. If you're having trouble launching the USB drive, you probably just have to put it ahead of your system drive in the BIOS (look for boot options).

If you want to get rid of Windows 8, load your primary OS and launch partition software (again, Disk Management for Vista or 7 users). Delete the Windows 8 volume and extend your remaining partition into the freshly unallocated space. Removing Windows 8 could screw up your bootloader and prevent your original OS from starting properly. Don't panic, this is a simple fix. Windows Vista and 7 users can use the automatic Startup Repair, while Windows XP users will have to get their hands a little dirtier.

Windows 8 Tricks, Tips and ShortcutsWindows 8 Tricks, Tips and Shortcuts


Windows 8 Consumer Preview cracked 1 million downloads shortly after launching last Wednesday and I'm sure many of you have tried it already. Whether you went with a dual-boot, upgrade, clean install or virtual machine, if you're coming from Windows 7 you'll notice significant changes immediately, while others may not be as obvious.
Inevitably, with change comes good and bad -- at least until you learn some tricks that get you back up to speed. I know I've been hitting my head against the wall when things don't behave the way they used to. The Start menu's absence is a perfect example of a radical change. Indeed, the duality of the OS may bring some trouble, but as skeptical as I was, I must admit Microsoft has done a pretty good job of easing many of my concerns.
Metro is undoubtedly very touch-oriented and perhaps a beginner's dream come true. For experienced users, it seems like Windows 8 still holds some promise. The devil is in the details, they say, so besides experimenting with a clean install I tried the upgrade option to see how well it worked. Going from a year-old Windows 7 install to the Consumer Preview was as seamless as you could ask for.
File copy dialogs, the task manager and search look better and work faster, and that adds up for an improved experience. I'm not loving Metro on my desktop since there's little I can currently do with the stock apps, but I wonder if that will be true once my most-used programs take full advantage of live tiles.
Without further ado, here's a shortlist of Windows 8 shortcuts and useful quick tricks I've gathered thus far.
Hot corners
The Start menu is no longer there, but there's a hot corner that makes up for it (unfortunately on multiple screens it's somewhat of a pain to use).
  • Lower-left corner + Left click Goes to the Start screen (Metro).
  • Lower-left corner + Right click Power user shortcut menu (Device Manager, Control Panel, Command Prompt, Power Options, etc.).
  • Upper-left corner Shows open window thumbnails, click to switch between them.
  • Upper screen limit + Click & Drag on desktop Move to left or right to snap the current desktop or Metro app to one side of the screen.
  • Lower-right corner Windows 8 Charm menu or Windows Aero Peak.
  • Upper-right corner Shows Windows 8 charm menu.

Left or right click on the lower-left corner and you'll be surprised with
a useful Windows orb replacement.
Keyboard shortcuts
Windows 8 is very hotkey-heavy, here are some of the shortcuts I find most useful:
  • Windows key Shows the new Start screen (Metro).
  • Win + type keyword Instant application search (same as in Windows 7).
  • Win + D Standard Windows desktop. Also minimizes/restores all open windows in desktop mode.
  • Win + Q Shows all installed apps.
  • Win + W Instant search for settings.
  • Win + F Instant search for files.
  • Win + I Settings sidebar (control panel, network, volume, brightness, notifications, and more).
  • Win + P Shows multi-monitor options, also useful for connecting an external monitor or projector.
  • Win + X Power user shortcut menu (Device Manager, Control Panel, Command Prompt, Power Options, etc.).
  • Win + Z Shows App Bar in Metro applications.
  • Win + . (period) Snaps the current Metro app to the right side of the screen. Do it twice and it will snap to the left.
  • Win + . (period) + Shift Snaps the current Metro app to the left side of the screen.
  • Win + J Switches focus between snapped Metro apps.
  • Win + Page Up / Down Moves full-screen Metro app to secondary monitor.
  • Win + Left / Right arrow Moves and snaps desktop applications in that direction, or to a different monitor.
  • Win + Tab Switches between open applications. Similar to using the left-upper hot corner with a mouse.
  • Win + L Locks Windows.

You can snap Metro apps or your desktop to the side and continue working on the center of the screen.
Another shortcut lets you switch focus between the two.

Showing all apps at once (Windows Phone style) and searching with a few keystrokes is
the Windows 8 equivalent to the old Programs menu.
Get the Start Menu back, orb and all!
Following user posts in our previous Windows 8 articles, I've seen some of you wanting to completely get rid of Metro and get the Windows 7 orb back. If that's the case I'd personally recommend you just stick to Windows 7, but if you already jumped ship there's a trick to do so as discussed on AskVG.
Updated: A second, improved alternative The clever folks at Stardock have released a piece of software called Start 8 that essentially adds a Start button to Windows 8's desktop mode. When you click on it you get a Metro-esque Start menu from where you can search and access other settings.
Remove that pesky wallpaper watermark
As we've seen on older betas, Windows 8 CP shows a wallpaper watermark indicating it's not a final build. The lock screen or Metro UI don't have any similar nagging reminder, and spending a majority of my time in the desktop mode, the message is tacky to say the least. Here's a solution I found circulating on a few forums:
  • Download this zip file and install the InstallTakeOwnership.reg registry file
  • Take Ownership from the shell32.dll.mui file located on C:WindowsSystem32en-US
  • Take Ownership from the basebrd.dll.mui file located on C:WindowsBrandingBasebrden-US
  • Copy and replace the shell32.dll.mui from the Edited Files to C:WindowsSystem32en-US
  • Copy and replace the basebrd.dll.mui from the Edited Files to C:WindowsBrandingBasebrden-US
  • Close the Windows Explorer window and open the Command Prompt with Administrator rights (remember that Win + X shortcut?)
  • Type mcbuilder, wait for it to finish and reboot.
Other quick tips
  • Drivers Windows 8 won't suffer the same fate Vista did with drivers. Most Windows 7 drivers will work just fine with the new OS. Nvidia advised GeForce owners to use the readily available 295.73 driver set, while AMD decided to release new Radeon drivers for the Consumer Preview.
  • Recalling storage space after setup Your mileage may vary with a Windows 7 upgrade. It worked great for me but remember this is still beta software. Anyway, if you upgraded you may want to restore files from the Windows.old directory which contains data from your older OS installation and other files used during the setup using the Disk Cleanup tool. Reminder #2: If you upgrade, you can't revert back to Windows 7.

You can recover a few gigabytes worth of storage space if you
clean up after a Windows 8 upgrade.
  • Upgrading to Windows 8 Windows 8 will offer a complete upgrade option from Windows 7, but the same won't be possible if you are using Vista or XP (or the current Consumer Preview for that matter). System requirements for Windows 8 are essentially the same as Windows 7 (which were similar to Vista), so most semi-modern hardware will run it just fine.
  • Metro notifications, turning some of those off Windows 8 encourages you to use a Microsoft account so you can take advantage of neat features like SkyDrive or syncing your OS settings across multiple PCs. However, it will also activate other things like the Messaging Metro app, which looks good, but becomes a nag if you are using a different IM client like Trillian or Pidgin. Windows 8 uses notifications that resembles those of Growl on OS X. You can fully manage, and deactivate the Messenger app notifications from the Settings menu.

Windows 8's notifications look good and serve a purpose, but you may want to be
selective about the programs that can interrupt your workflow.
  • Native screenshots in Win 8 Although using a third-party tool like Droplr remains the easiest way to grab and share a screenshot, Windows 8 finally adds a screenshot shortcut that doesn't require the snipping tool or another program where you can paste the taken image. Win + Prt Sc does the trick, saving a PNG image file on the Pictures folder.

Few Computer Tips & Tricks Everyone Should Know.


General Tricks

Windows hidden "god mode" folder Windows offers a centralized Control Panel for all of the OS settings, which makes it easy for users to tweak everything from desktop background to setting up a VPN. To enter this mode, create a new folder with this exact name (copy and paste it): God Mode.{ED7BA470-8E54-465E-825C-99712043E01C}. The folder icon will change to a Control Panel-style icon, and you will be able to jump in and change all kinds of settings. Note: Don't try this on Windows Vista 64-bit as it's known to cause a reboot loop.


Use Problem Steps Recorder This handy tool automatically records any mouse clicks and takes screenshots for you. If you need tech assistance with your computer, go to Run by typing Windows + R, and then type "psr." Use the tool and by the time you are finished, you can send this information, neatly compiled automatically, to the person helping you with the issue. It will make the process of finding the problem much easier for them, which means you will be able to get your system up and running faster.
Find/Delete large files wasting space A handy tool called WinDirStat (Windows Directory Statistics) can be used to easily find which files and folders are taking up the most space on your drive. From there, you can delete them and open up a ton of storage space.
Reduce the number of programs running at startup If your PC is taking too long to boot, it’s probably because you have far too many programs running at startup. Reducing this is easy, it will make your PC launch noticeably faster and lighter upon first load. To change the items running at startup, go to Run using the hotkey Windows key + R, and type "msconfig." A small window will appear (see the screenshot below), select the Startup tab. From here you will be able to turn off many startup programs, which can shave several seconds (or minutes) off your boot time. (Note Windows 8 has moved this functionality to the Task Manager). Try to make sure you research what you are turning off as some processes might be needed by third party programs or drivers you have installed.


Typing Tricks

Delete an entire word Instead of deleting a single letter, pressing CTRL + BKSP will delete the entire word behind the cursor. This makes deleting text quicker if you screw up a whole word.
Move Cursor to beginning of the next or previous word Moving the cursor around manually while typing is a great way to make your work take longer than it needs to. To speed of the process, move the cursor around with keyboard shortcuts. To move it to the beginning of the previous word, use CTRL + Left Arrow. To move it to the beginning of the next word, use CTRL + Right Arrow. In OS X you can accomplish the same using the Option key.
Making sub and superscript text If you need to make sub or superscript text (think exponents for superscript), press CTRL + = for subscript and CTRL + SHIFT + = for superscript.
Paste plain text of what was copied When you copy text from any source, programs will usually copy any formatting that comes with it. To paste this as plain text, press CTRL + Shift + V instead of the standard CTRL + V, and the system will paste unformatted text.
Note that many programs follow this parameter (Chrome, Firefox, etc.) but not all, particularly Microsoft programs like Word or Outlook. For those there's a few alternatives that go beyond copying and pasting in Notepad: 1)CTRL + ALT + V will show a 'paste special' dialog box. 2) CTRL + Spacebar will remove formatting in already pasted text. 3) Download Puretext and choose a hotkey to always paste plain text with it.

Keyboard Shortcuts

Copy only active window to clipboard Normally, the Print Screen key copies the entire display (or two displays if you got them), ALT + Print Screen only copies the currently active window to the clipboard. Whether taking a screenshot to diagnose a problem, or just because you want to show something to a friend, this will come in handy.
Fix those little mistakes Did you know you can undo almost any action? CTRL + Z is the ultimate hot key, and for sure you knew about it already, however note that undo doesn’t just apply to typing. If you accidentally delete or move a file, you can hit CTRL + Z to bring it right back to where it was. In Chrome and Firefox you can also undo closing a tab using CTRL + SHIFT + T.
Cycle through open windows Pressing ALT+TAB allows you to cycle through currently open windows. This makes switching back and forth between running processes quick and painless. If you want a more stylish method of cycling through open programs, Windows + TAB will do the job for you.
Interrupt all processes CTRL + ALT + Delete is one of the most common PC shortcuts, and one almost everyone is familiar with. The important thing to note is that it interrupts all processes, including the one that is bogging down your system, which can mean the difference between needing to restart or not.

Close the current program Typing ALT + F4 will close the program that is running. This is useful as it saves you time mousing over the "X" and clicking. People will often use this as a joke, telling you to press ALT + F4 to fix a problem. Don’t fall for it unless you want to close what you are doing.
Minimize all windows Sometimes you have a bunch of stuff running, and you want it all to go away so you can get to the desktop. Simply pressing Windows + D will minimize everything you have up, which will save you some time pressing the minimize button for each window. It should be noted that Windows + M offers similar functionality, but there is no undoing, so Windows + D is the more favorable approach.
Open the task manager directly If you want to bypass the interrupt that happens when pressing CTRL + ALT + DEL and jump right to the task manager, typing CTRL + Shift + ESC launches it directly.
Close the current window/tab Stick of moving all the way to that X button? Press CTRL + W and the current window will close. (Don’t do it now, or you will miss the rest of the tricks!)
Bring up the system information window This is so much quicker than digging this out the traditional way... Just press Windows + Pause/Break and the System Information panel will be ready to go. This might be the only use for the Pause/Break key you will ever find, so enjoy it!

Web Browsing Tricks

Automatically add www. and .com to a URL You can shave off a couple of seconds typing in a URL by simply click CTRL + Enter after you type the name of the site. Need .net instead of .com, press CTRL + Shift + Enter instead.
Jump to address bar There are a number of ways to jump right to the address bar from anywhere in browser. Pressing CTRL + L, F6, and ALT + D all accomplish this goal.
Bring back a closed tab We covered this already, but it's super useful. Accidentally closed a tab? Simply press CTRL + Shift + T to reopen the most recently closed tab and get back to what you were doing.
Use private browsing The uses for not having cookies and history saved are obvious for certain activities, you know, like shopping for gifts on a shared computer (of course!). Pressing CTRL + Shift + N will launch a new private in Chrome, CTRL + Shift + P will do it in Firefox and Internet Explorer.
Cycle through open tabs Pressing CTRL + TAB while in a browser will flip between each one. This can be much faster than moving the mouse and clicking on a tab. CTRL + NUM (1, 2, 3, 4, n..) will also take you to certain tab in that numeric order.

File Management Tricks

Rename a file quickly Right-clicking and selecting rename is not very efficient. Instead, simply press F2 while a file is selected to change its name. To alter the name of another file, type TAB without deselecting the current file.
Rename files sequentially in Windows You actually don’t need to download any programs to perform a batch file rename in Windows. Instead, you can select all the files you want to change, right-click the first one in the list, select rename (or use F2), and type in the name. This will automatically change all the other files with the same root name with a suffix: (1), (2), and so on.
Select multiple files using the keyboard To select a bunch of files using your keyboard, you can press Shift + down arrow to select a single file or Shift + Page Down to select a large group of files at one time.

Security Tips

Run programs on an infected PC Often times, malware will prevent a computer from running certain programs. Changing the name of the .exe file can often override this. If that doesn’t work, changing the extension to .com is another useful alternative, and the program will still be able to run in spite of the extension change.
Read installers Even major programs can install toolbars and other unwanted pieces of software during installation. Take a few seconds to read each step to make sure you are not agreeing to install something other than the program you were actually seeking. Far too often people just push next over and over, and end up with a browser covered in various search bars that just aren't needed. In the worst of scenarios, these can have nefarious intentions.
Lock your computer if you get up Sick of your "friends" going onto your computer at work or home and posting things on your Facebook/Twitter page on your behalf? It’s certainly an annoyance, but an easy one to prevent. Windows + L will lock your system right away, requiring a password (if you've set one) to log in again.

Program-Specific Tricks

Photoshop: Drag the marquee without losing the ability to size it The marquee tool is, at its most basic level, designed for selecting a part of an image. It’s used constantly in Photoshop, and there is a handy trick many users miss. While dragging it around, you can press space, which will allow you to size it while moving it. This saves time by letting your perform two key functions at the same time.
Steam: Move games to another drive or partition By default, Steam installs all games to the same HDD or partition, but what happens if that fills up? The solution: download Steamtool Library Manager. It makes it easy to move games to another hard drive without messing with the functionality of Steam.
VLC: Fix unsynced audio and subtitles In the popular media player VLC, if your audio loses sync with the video or subtitles, there is an easy way to fix this. Simply pressing J or K will move the audio forward or backwards. Similarly, to sync the subtitles you can press H or G.
The combination of using these tips and tricks on a daily basis will most certainly make your computer life much more enjoyable, or at least more practical. And so, did you learn a thing or two that you didn't know before?